Like a lighthouse that only works from one angle, your gas monitors can miss the hazards you think they’re guarding against. You need to understand what “detection limit” really means, how manufacturers measure it, and how airflow, placement, and sensor type create blind spots. Get this wrong and alarms lag or never sound—so keep going to learn practical fixes and test methods that restore reliable coverage.
What Detection Limits Mean for Gas Sensors
When you evaluate a gas sensor, its detection limit is the lowest concentration the device can reliably distinguish from zero under defined conditions; this isn’t just the smallest number the manufacturer lists, but a statistical threshold tied to signal-to-noise, confidence level, and measurement protocol.
You’ll use that detection threshold to determine whether a sensor suits a task: routine monitoring, leak detection, or exposure assessment. In practice, you’ll compare the detection threshold to required action levels and background concentrations, since gas sensor accuracy near the limit degrades and false positives or negatives rise.
You’ll also consider response time, calibration stability, and environmental factors that shift noise and bias. When selecting or validating sensors, quantify uncertainty and specify the confidence interval associated with the detection threshold.
That lets you set operational rules (alarm points, confirmatory sampling) that reflect real-world performance rather than nominal specifications, ensuring decisions are defensible and risks are managed.
How Manufacturers Test and Report Detection Limits
Although test methods vary, manufacturers typically determine detection limits by measuring sensor responses to a series of low-concentration gas exposures and quantifying the signal distribution and noise under controlled conditions.
You’ll see protocols that define limit of detection (LOD) and limit of quantitation (LOQ) using statistical criteria (e.g., 3σ and 10σ of baseline noise) derived from repeated blank and low-level measurements.
Detection methodologies are documented to show sampling rates, exposure durations, and environmental controls because those factors alter noise and response linearity.
You should expect reports to reference calibration standards and traceable gas mixtures used to generate concentration points and verify instrument linearity.
Manufacturers will state the test temperature, humidity, and flow conditions and may provide confidence intervals or false-alarm probabilities.
When evaluating specifications, compare test conditions to your intended use, since reported limits reflect the controlled protocol rather than every field scenario.
Why Detection Limits Differ by Gas and Sensor Type

Because different gases interact with sensing materials and transduction mechanisms in distinct ways, you’ll see detection limits vary considerably across sensor types and analytes.
You need to evaluate sensor sensitivity as a function of physicochemical affinity, transducer gain, and noise floor: electrochemical cells depend on redox kinetics, semiconductor sensors on surface adsorption/desorption, and optical sensors on specific absorption cross-sections.
Gas reactivity matters—highly reactive species produce larger, faster transduction signals at lower concentrations, lowering detection limits; inert gases rely on less direct mechanisms and require higher concentrations for reliable detection.
Practical selection requires matching expected analyte properties to sensor mechanism: choose electrochemical for reactive toxic gases with distinct redox behavior, nondispersive infrared for molecules with strong IR bands, and photoionization for VOCs with low ionization potentials.
Also consider calibration stability, cross-sensitivity, and expected environmental conditions, since they alter effective sensor sensitivity and consequently real-world detection limits.
Common Blind Spots: Physical, Environmental, and Installation Causes
You’ve matched sensor chemistry and transduction to the target gas, but real-world performance often falls short of lab specs due to physical, environmental, and installation factors.
You need to anticipate how physical barriers and environmental conditions conspire with installation choices to create blind spots that raise effective detection limits.
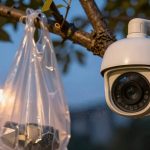
- Obstructions: equipment, ductwork, or shelving create physical barriers that prevent representative airflow to the sensor—response is delayed or absent.
- Microenvironments: temperature gradients, humidity pockets, and stratification change concentration profiles and sensor sensitivity.
- Contaminants: aerosols, particulates, or interfering vapors deposit on or react with sensing surfaces, causing drift or poisoning.
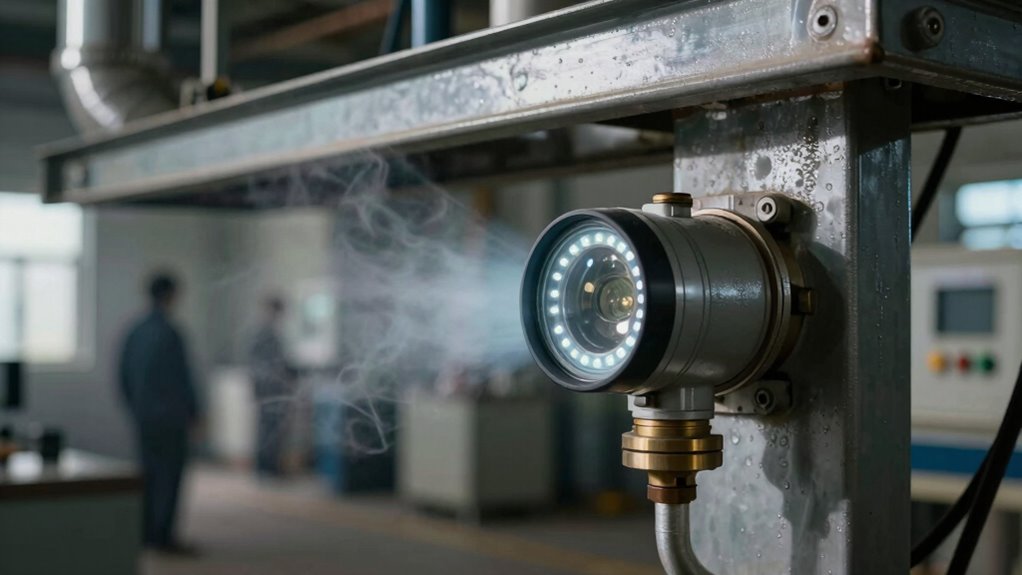
- Mounting errors: improper orientation, sealing gaps, or incompatible enclosures alter flow dynamics and thermal coupling, degrading performance.
You’ll validate in situ sensitivity with challenge tests, monitor drift trends, and specify maintenance intervals to mitigate these common blind spots.
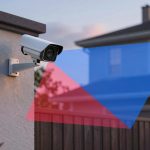
Placement and Ventilation Risks That Defeat Detection Limits

You need to place sensors at heights that match the gas density and anticipated plume behavior, since a meter or two can be the difference between early detection and missed accumulation.
You also have to account for ventilation-driven deadzones where airflows create pockets of diluted or stagnant gas that standard placement won’t sample.
We’ll next examine practical placement rules and ventilation assessment techniques to reduce those risks.
Sensor Placement Height
When selecting sensor height, consider how gas buoyancy, thermal stratification, and room airflow patterns will alter concentration profiles so you can place detectors where target gases will actually reach alarm thresholds.
You’ll use sensor height as a control parameter to match gas properties and expected release scenarios for ideal placement.
- Assess gas density vs. air: heavier gases accumulate low; light gases rise—set sensor height accordingly to detect when concentrations approach alarm setpoints.
- Map vertical gradients: measure concentration at multiple elevations during representative operations to locate peak exposure layers.
- Account for obstacles: shelving, machinery, and ceilings create shortcuts or traps that shift plume rise/fall.
- Validate placement: perform challenge tests and adjust sensor height to guarantee timely detection without false negatives.
Ventilation-Induced Deadzones
Adjusting sensor height to match gas buoyancy and room stratification won’t protect you from areas where ventilation itself prevents reliable detection.
You must assess airflow patterns, inlet/outlet placement, and recirculation zones because ventilation challenges create pockets where tracer gases dilute below alarm thresholds.
Use CFD or smoke testing to map velocity vectors and stagnation regions; measure transient concentrations, not just steady state.
Place redundant sensors at predicted low-flow pockets and along shear layers where mixing is intermittent.
Consider purge timing, fan schedules, and HVAC fault modes in your alarm logic so you won’t miss short-duration exposures.
For verification, run controlled releases to validate deadzone detection and update placement after any ventilation change to maintain detection integrity.
Reduce Blind Spots: Fixes for Fixed and Portable Systems
You should map hazards and place sensors where airflow and obstructions could create pockets of undetected gas, prioritizing coverage at likely leak sources and stratification zones.
For portable units, adopt systematic sweep patterns and fixed mounting points to guarantee repeatable sampling geometry.
Maintain strict calibration and bump-test schedules so sensor response remains accurate and blind-spot mitigation stays effective.
Strategic Sensor Placement
Although sensor quantity matters, perfect placement is what actually reduces blind spots most effectively: you’ll map expected leak sources, airflow patterns, and obstructions, then position fixed and portable detectors to maximize coverage while maintaining required response times.
You’ll prioritize sensor orientation and maintain ideal distance from probable release points to guarantee representative sampling and rapid detection.
- Locate sensors upwind/downwind relative to vents and likely leak points, accounting for variable airflow.
- Place fixed units at chokepoints and low/high strata based on gas density; adjust portable routes accordingly.
- Set orientation to minimize wall/ceiling interference and reflect true concentration gradients.
- Use overlap zones with staggered ideal distance spacing to prevent blind spots while preserving response time and maintenance access.
Routine Calibration Checks
Start routine calibration checks by establishing a reproducible schedule and documented procedure that covers both fixed and portable detectors, because consistent, traceable calibrations are the single best defense against drifting sensors and the resulting blind spots.
You’ll define intervals based on manufacturer guidance, environmental stressors, and historical drift data, then log each routine calibration event with date, technician, gas concentration, and pass/fail criteria.
Use certified gas standards and automated calibration rigs where possible to minimize human error and improve repeatability.
Validate sensor accuracy post-calibration with an independent challenge gas and record deviation from nominal.
Implement alarm threshold verification and a corrective-action workflow for sensors outside tolerance.
Review calibration records periodically to optimize intervals and reduce long-term blind-spot risk.
Tests and Calibration to Validate Field Detection Limits
When validating field detection limits, you’ll focus on reproducible tests and calibrated references that link laboratory sensitivity to operational performance; this means defining acceptance criteria, selecting traceable calibration gases or standards, and establishing test procedures that mimic field conditions (flow, temperature, humidity, interferents) so measured detection limits reflect real-world capability.
You’ll design field testing and calibration procedures to verify detection probability at target concentrations, quantify uncertainty, and identify systematic bias. Execute controlled exposure sequences, record response statistics, and compare to statistical thresholds (e.g., 95% detection). Use equipment with traceable certification and document chain-of-custody for gases and standards.
- Define acceptance criteria and statistical pass/fail thresholds for detection probability.
- Choose traceable calibration gases, generate dynamic dilutions, and verify concentrations.
- Replicate environmental conditions (flow, T, RH, interferents) during tests.
- Document results, compute limits of detection with uncertainty, and archive calibration procedures.
These steps make detection limits defensible, reproducible, and applicable to operational deployments.
Real-World Failures and Fixes: Lessons for Safety Managers
Having validated field detection limits through controlled, traceable calibration and environmental testing, you’ll now examine where systems actually fail in the field and how to fix them so safety programs stay reliable.
Start by reviewing real world incidents: sensor poisoning, inlet contamination, power interruptions, and firmware regressions. For each, document root cause, time-to-detect, and exposure outcome.
Update safety protocols to mandate periodic challenge tests, redundant sensing in critical zones, and proven response algorithms for false positives and negatives. Implement data integrity checks and tamper-evident logs to detect drift or malicious changes.
Train operators on diagnostic procedures and decision trees, emphasizing immediate isolation and verification steps. Verify spare-part inventories and standardized replacement procedures to minimize downtime.
Finally, integrate incident lessons into scheduled calibration and risk assessments, and track corrective actions with measurable KPIs so you can demonstrate continuous improvement and materially reduce the chance that a similar failure compromises monitoring or personnel safety.
Frequently Asked Questions
Can Detection Limits Change Over a Sensor’s Lifetime?
Yes — detection limits can change as sensor degradation occurs over time; you’ll need increased calibration frequency and drift monitoring, adjust alarm thresholds, and replace or recalibrate sensors proactively to maintain accurate limits and reliable detection.
Can Interference From Multiple Gases Skew Alarm Thresholds?
Yes — interference from multiple gases can skew alarm thresholds: you’ll need sensor calibration informed by expected gas mixtures, apply cross-sensitivity corrections, and verify performance with controlled mixtures to prevent false alarms or missed detections.
How Do Regulatory Standards Differ by Industry and Region?
They vary: you’ll follow industry-specific exposure limits and testing protocols, regional variations dictate accepted standards and certification bodies, and regulatory compliance requires documented procedures, reporting, and periodic recertification tailored to local laws and sectoral risks.
Are Wireless Network Outages a Common Blind Spot?
Yes — you’ll face outages; like a brittle bridge, wireless reliability can fail under load. You’ll need redundancy, diagnostics, and shielding against signal interference, plus testing and SLAs to maintain continuous, measurable detection performance.
Can Personal Protective Equipment Mask Sensor Exposures?
Yes — PPE can mask sensor exposures by altering airflow and contaminant access; you’ll need sensor calibration adjustments and consider reduced sensitivity over exposure duration, using positioning and sampling strategies to guarantee accurate readings despite barriers.